When it comes to productivity software (to-do lists in particular), OneNote is a clear choice if you need:
-
Elaborate and or complicated notes
- multimedia attachments
- pen input and handwriting recognition
- voice and video recording
-
Detailed pen input
- sketches overlapping multimedia
- diagrams mixed with text
- A less prohibiting structure
If you don’t need any of those things there are more suitable applications out there for you. If you do need all of that stuff, and you’re looking to keep your to-do list in OneNote then this tutorial is for you.
I wrote this particular tutorial to show one way (there are lots of ways – checkbox tags, outlook task integration, etc.) that someone could use OneNote for their to-do list.
OneNote To-Do List Tutorial (25 Steps):
-
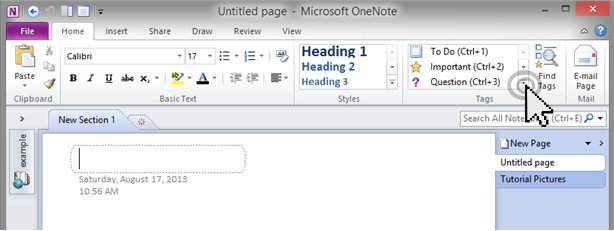
Before anything else, set up your tags. Click the dropdown arrow as shown to show the current list of tags.
-
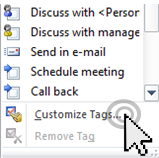
At the very bottom of that dropdown you’ll see a button called [Customize Tags…]
-
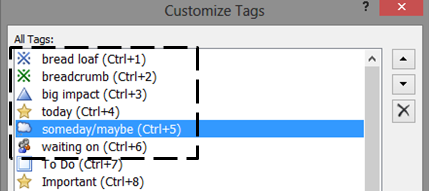
Clicking that will take you to the ‘Customize Tags’ window. From here you can create new tags or modify existing ones. For me, I just created new tags.

-
Customize your tags however you see fit. Some of the tags I created are called “bread loaf” and “bread crumb”. A bread loaf tag represents a task that is too big or complex to sit down and just do. So, wherever I have a bread loaf tag, I should put some thought into creating an associated breadcrumb tag. A bread crumb tag represents something that’s do-able and not too complicated. “Start for 5 minutes” could be a good bread crumb task.
-
Now you can start making a list and assigning tags.

-
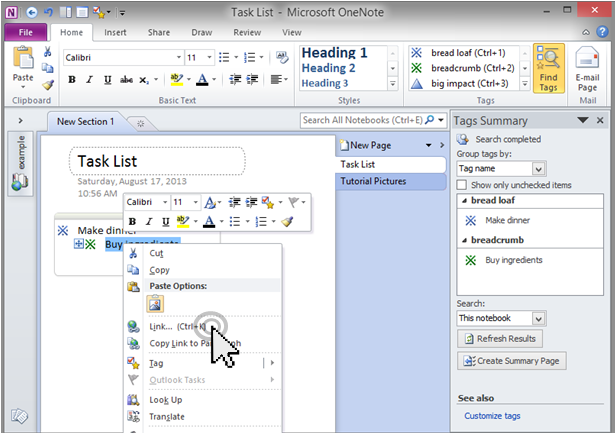
You may notice, from previous steps, that there are keyboard shortcuts that you can use to assign tags. In fact, it looks like there are 9 shortcuts for that. In the screenshot below, I initially created a blank list and then clicked [Ctrl]+[1] to assign the top item to ‘bread loaf’ and [Ctrl]+[2] to assign the next item to ‘breadcrumb’.

-
Now toggle the ‘Find Tags’ button to show all of your tags on the right hand side of your OneNote screen.

-
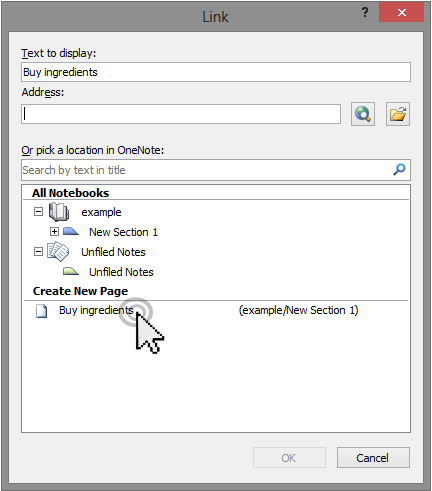
Now let’s create a linked item by highlighting the words we want to link and then pressing [Ctrl]+[k]. Alternatively, you can right click your highlighted item to get a menu and select the ‘Link…’ button from there.
-
After that you’ll get the ‘Link’ screen where we can create a new page. After all this, you’ll be able to click the link on your task list and it’ll take you to the linked page.
-
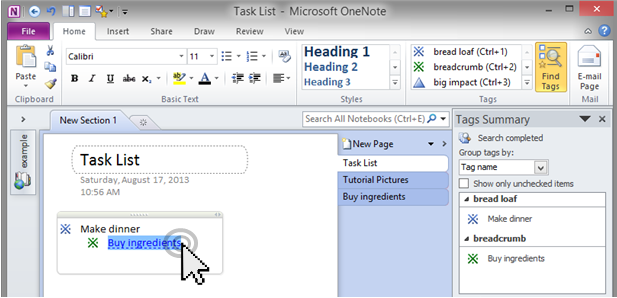
Now your task list has a linked item! Click your new linked item to populate it with stuff.
-
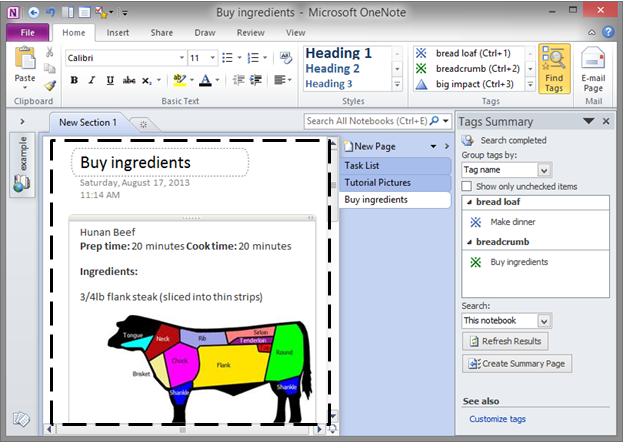
I populated my linked page like this:
-
Now I can go back to where I was, my task list, by pressing [Alt]+[left arrow key] on the keyboard. Once back at the task list, I’ll add more tasks and tags then click the [Refresh Results] button to show my updated ‘tags summary’.

-
Let’s add even more items!
-
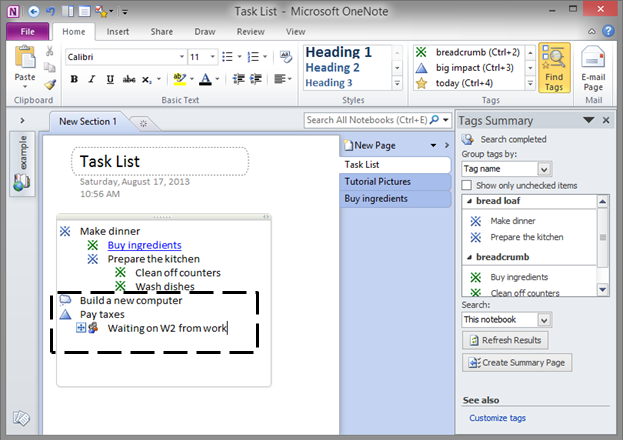
After adding additional items and tags, press [Refresh Results] again.

-
If you make your OneNote window big enough, you’ll see a nicely formatted list.

-
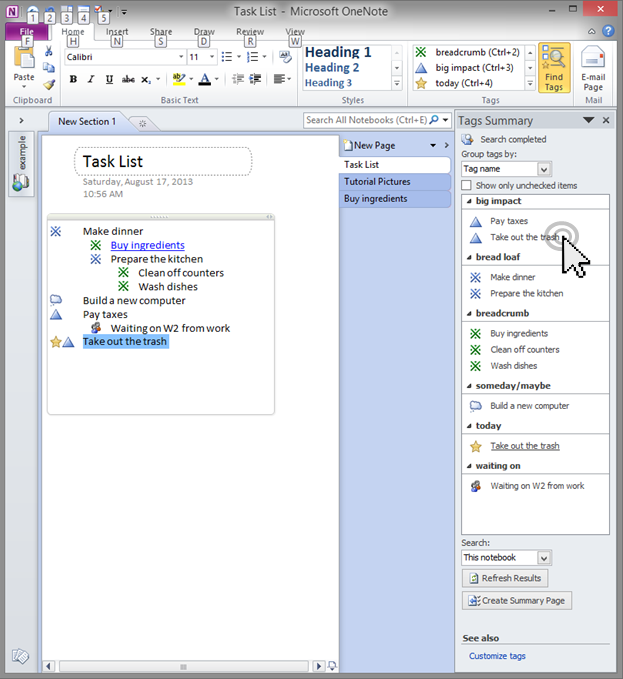
Now let’s imagine that I actually do one of those tasks and need to adjust my list accordingly. First I’ll do the task and then click the task from the ‘Tags Summary’ pane to highlight the entire line item.
-
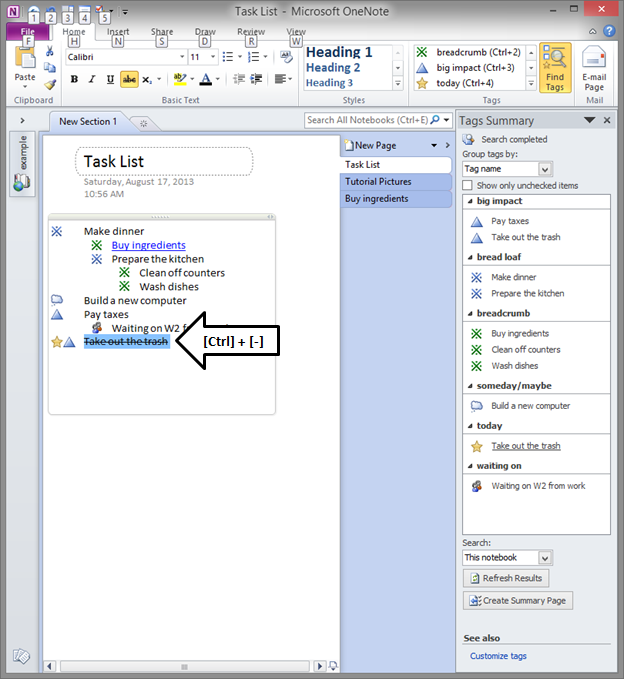
Then I’ll press [Ctrl]+[-] to cross out the line item on my list.
-
Now I’ll press [Ctrl]+[0] to remove all of the tags from that line item in my task list.

-
At this point, we can update the ‘Tags Summary’ by pressing [Refresh Results]. The updated summary should no longer show the item that we just completed!

-
Now let’s rename our notebook to something proper, if you haven’t already, and add in some additional sections and pages to it. While you’re there, assign a tag to a task/line from one of your new pages.

-
Click [Refresh Results] to show your new line item in your summary.

-
Now create a new notebook called ‘Work’ and throw a task/line item in there before assigning a tag to it. After that, select ‘all notebooks’ as the search criteria for the tags summary.

-
Click [Refresh Results] and you should be able to see the tags from both the ‘Home’ notebook and the ‘Work’ notebook. Of course, if you were to click the task in your tags summary page, OneNote will promptly escort you to wherever that item appears in your notebooks.

-
Click the ‘Work’ notebook and change your tags summary search criteria back to ‘This Notebook’. Then click [Refresh Results]. Now you should only see the tagged items from your ‘Work’ notebook.

-
If you have the OneNote phone app, you can sync all of these changes to it. Here’s what it looks like on my phone after a sync:


